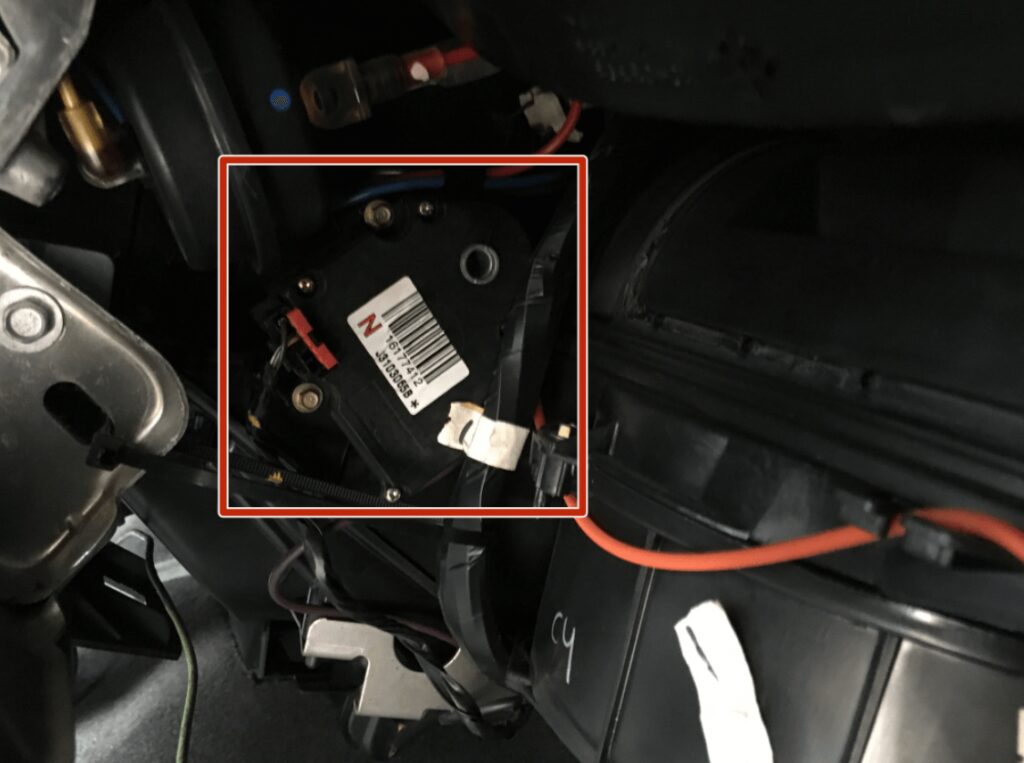
A blend door actuator can turn up problems at any time, and it is also true for the pickup truck, Chevy Silverado. A simple Chevy blend door actuator reset process can solve your issues.
When your car heater is blowing cold air, it indicates the blend door actuator problem.
Table could not be displayed.Professional mechanics can help you in resetting your blend door actuator. However, it is better to try out the Chevy DIY process to manage the issue.
A blend door actuator comprises a specially designed electric motor intended for turning the plastic unit in a particular direction.
There may be different reasons for which your blend door actuator can cause problems. In some cases, the motor part burns out, and the system turns out to be non-responsive.
Moreover, you may find your plastic gear becoming brittle, and that’s why you can hear a ticking noise. You can notice the problem mostly in the vehicle’s heater and AC systems.
While starting the vehicle, you will find a knocking sound.
You may feel that someone is tapping on the door. The door actuator might serve to be a problem. You may also find your blend door moving constantly. To restore the actuator, you can reset it.
Chevy Blend Door Actuator Reset: How to Do
Before learning about the reset process, it is better to know how the blend door actuator works. There is a plastic housing integrated with a blend door actuator.
The system also includes a door position sensor that helps deliver feedback to the climate-controlling computer system.
The blend door actuator plays an important role in moving the air and temperature direction doors into the heater plenum. The overall unit enables you to adjust mode settings, like the floor, temperature, defrost, mid vent, recalibration modes, and fresh air.
Besides, they control cold and hot settings for the left and right passenger compartments. The climate control computer system, present in your Chevy, sends out an electrical command.
The actuator receives this command and moves the integrated motor to alter the air direction modes. You can find variations in the direction based on the temperature selected by the passenger and driver on your dual climate controlling system.
In most cases, you can find these units positioned in different parts adjacent to the plenum. Depending on the vehicle model, you will notice a difference in their positions.
Step 1: Take the Lower Dash Panel Out of the System
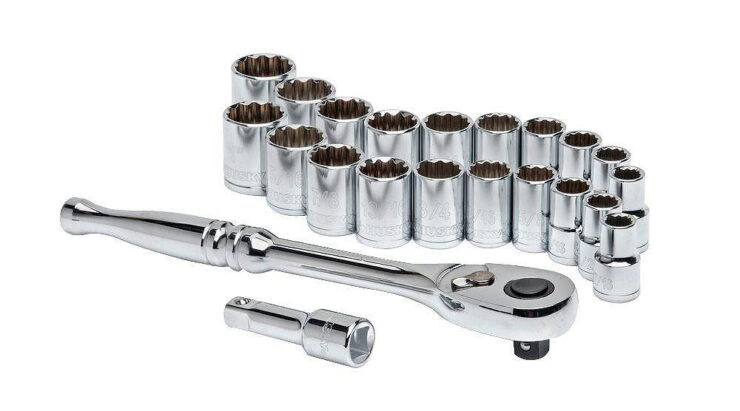
You can use a ratchet and a small socket to remove all the mounting bolts present under the passenger-side dash plastic cover. As there may be some hidden screws, you have to check them thoroughly.
When you have successfully identified the mounting screws and removed them, you have to pull out the cover. Access the underside part of your dash to remove this cover.
After removing the cover, you will find a range of controls, including wirings and heater box. You will also notice the temperature actuator working for the dual climate control.
Step 2: Start Removing your Door Actuator
It is easy to deal with the actuator hanging below the box. You can use a small screwdriver that helps in releasing the safety clip of the wiring.
The clip is present on the actuator’s harness. You can then pull down the wiring connector after releasing it gently and removing it from the actuator.
Step 3: Take the Actuator Out of the Unit
Now, you need to locate the mounting screws of your actuator and remove them. You may find at least 2 to 3 screws that hold the system a proper place.
You will need a special tool for the removal of screws from the tight and hard-to-access places.
To avoid losing those screws, you may take a container and keep them organized. Store these small screws properly and access them at any time.
As you have now removed your mounting screws, your actuator will turn out to be loose. Then, hold the actuator while pulling it from the mount. It will make your removal process easier.
Step 4: Deal with your Air Door Pivot
Before resetting and installing your actuator, you have to adjust the blend door manually in two directions. It offers the guarantee that there is no challenge while the actuator will be working efficiently.
Hold your door pivot to swing it in the back and forth direction. Make sure that it can move freely. When you cannot do it smoothly, it indicates the presence of an obstruction.
For instance, small objects, like bubble gum, toy, and toothpick, can prevent movement.
Thus, you must check your blend door functionalities and ensure that you can change the actuator motor. Turn on the blower motor and let the door work in every way.
Step 5: Reset the Actuator
At this step, you have to test the connector terminals and wiring. A thorough check is essential before reinstallation. Place all screws in a proper position and then push your harness connector back into your actuator.
You can hear a clicking sound indicating the right installation of the connector.
Step 6: Restore the Cover
The re-installation process is already done, and now, you can place the plastic cover properly. A slight jostling is necessary for the perfect lineup of the bolt holes.
When you have placed the cover, you can install your mounting screws manually.
Tighten each of the screws firmly. A loose screw can prevent you from installing other screws. As you have reinstalled the cover, you can turn on the engine.
Switch on the climate controls and move them to the floor positions.
These steps will help you in testing your how to reset Chevy blend door actuator. Upon reinstallation of the cover, the engine can be started for analyzing the repair task.
This can be done by switching on the feature of climate control and shifting between hot & cold.
This will check if the new actuator is operating efficiently.
Tools Needed to the Chevy Blend Door Actuator Reset Process
It is easy to reset your Chevy blend door actuator only when you have a right set of tools. There is no need to buy costly tools to accomplish this process.
You can execute the task with a few simple tools. The most important ones of them are-
● Ratchet- It is a simple tool that includes a metal handle to turn objects only in one direction. By using the ratchet, you can remove the bolt.
● Socket- It is a small tool with an opening, and you can fit some other parts into it.
The reset kit provides you with all the essential tools needed for the mechanical process.
Some Chevy truck owners find it difficult to deal with this reset process. They can go to mechanics to solve the problem. The actuator can be repaired & replaced without much time.
You may look for professional help and drive your Chevy pickup truck.
Cautions During the Actuator Reset Process
While resetting the Chevy blend door actuator, you need to pay attention to every detail. There are some delicate internal parts, and without proper management, you can get damaged.
For instance, you know about the wiring safety clips present on the actuator harness. Those clips may be brittle, and that’s why you have to deal with them carefully.
Moreover, you must inspect the wiring connector while removing it from your door actuator.
You need to clean the connector and check it for the signs of corrosion.
GM Blend Door Actuator Calibration
Blend door problems are not new to General Motors models. Some users also complain that they cannot control their vehicle temperature. The split system on the passenger end could also be a problem.
Likewise, several owners claim that the air is not coming out properly. For instance, after selecting the defroster, the windshield takes much time to clear.
GM models often have a defective actuator. Electronic actuators help control the airflow direction, and we refer to it as the blend door actuator.
Foggy views and slow-performing front windshield are some negative signs related to the electronic actuator.
Diagnosis of the Actuator
In some instances, you can find the air flowing out of your defroster vent. Although you have chosen the right position for the AC control panel, you may encounter this problem.
You might experience a clicking sound when the unit is not working properly. The stripping plastic gear present inside produces this sound. These are parts related to the upper actuator.
Literally, you have to identify the car’s part numbers while fitting your actuator assembly.
You may not find any noticeable difference in internal parts. But, the case holding the mountain holes and those parts can be different.
Temperature Mode Actuator- Locate the Assembly
You need to identify the temperature mode actuator usually present near the AC evaporator and heater core setup. You can find the actuator on the passenger side of most of the vehicles.
It is the lower actuator, as it helps in installing the blend door actuator motor above the heater case. When it starts malfunctioning, the vehicle operator may not adjust the temperature.
There are dual zone systems in some vehicles, where the passenger side will stop sending the response in hot and cold positions.
When you are dealing with your blend door motor, the grinding sound indicates that the internal gears are stripping inside for adjustments.
Calibration of Actuators
While buying replacement parts for your temperature control actuator, you have to focus on every detail. However, after the purchase, you have to calibrate your new actuator to ensure proper functioning.
Without calibration, you may not find the best performance of your calibrator. Some drivers claim the AC to be colder. Professional mechanics use a specially designed scan tool to link the climate controlling system.
It helps them in resetting your actuator limits.
Once the actuator has been installed, the calibration button can be used. It will turn on the automatic calibration process of new parts. Moreover, it ensures a perfect temperature control of the system.
You may avoid using a handheld device to calibrate the actuator.
Turn on the key and shift the controller to one of the directions. It will let the motor move in one direction and be turned off. Still, You can encounter the calibration problem after the replacement of your GM actuator.
Before hiring mechanics, you may try out our tips.
Conclusion
However, the brief guide on the blend door actuator reset process will be much helpful for Chevy owners. The actuator may cause a range of problems.
However, there is always no need to replace them to solve those issues. You can try to reset them and restore the system.
The replacement cost may be higher, and thus, you can look for other alternatives. With minimal effort, you may reset the blend door actuator.
While resetting the system, you have to locate the right actuator that needs adjustment.
Besides, you must check out the settings related to the door actuator. It will ensure the functioning of the actuator in all the available models.
The door can stick in some cases, and it denotes that there is something wrong with your actuator. You must confirm the problem before dealing with the actuator resetting process.
It will save you energy and time. When it is the case of simple calibration, you can do it easily with a few steps.
Our troubleshooting guide to this calibration process will be much valuable for you. However, to solve serious problems, you have to replace the system.
The process to reset and repair may be different for some blend door actuators. You can find a slight variation in their location in every vehicle.
Thus, this factor can make the process tricky for DIY mechanics. You can check out the location of your actuators in your Chevy model. The best option for you is to read the manufacturers’ manual and then start the reset process.


